How to Grow Potatoes in Containers (Australia)
A whole crop of spuds from a patio, balcony, or courtyard, with no digging
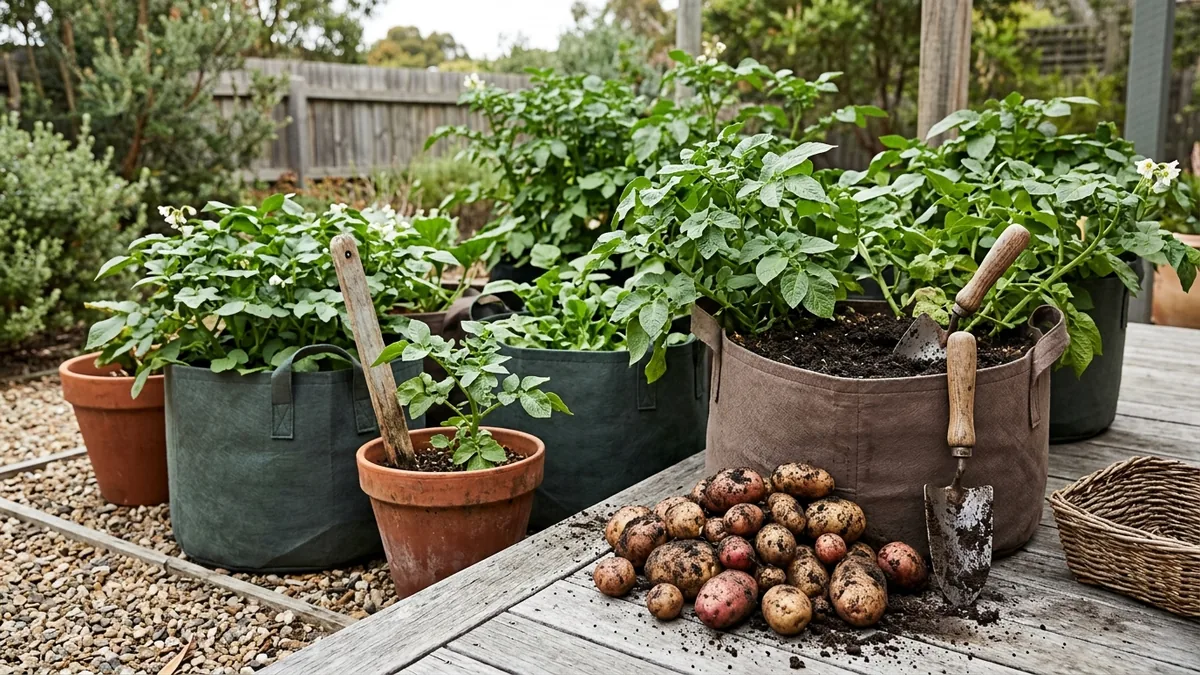
You do not need a big plot to grow potatoes. A single container on a sunny patio or balcony can yield several kilos of clean, home-grown spuds. Potatoes are one of the most rewarding crops to grow in pots and grow bags, because the whole harvest is right there when you tip the container out.
This guide covers everything for Australian growers: the right container size, why certified seed potatoes matter, chitting, the fill-and-hill method that lifts yields, watering and feeding, planting times by climate, and how to harvest and store. There is a calculator below to match the number of seed potatoes to your container.
Why Grow Potatoes in Containers
- No digging. Harvest is as simple as tipping the container onto a tarp and sorting the tubers out by hand.
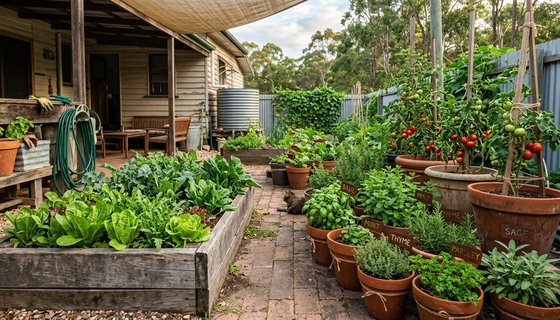
- Works on patios and balconies. A 40 litre grow bag fits in a courtyard, on a balcony, or beside the back door.
- Fewer soil pests and diseases. Fresh mix in a container avoids many of the soil-borne problems that build up in garden beds.
- Easy, clean harvest. No fork through the crop, no slicing tubers in half, no scrabbling in the dirt.
- Mobile. You can wheel containers into the sun, or move them under cover to dodge a late frost or a heatwave.
Container Potato Calculator
How many seed potatoes for your container?
Rule of thumb: about 10 litres of mix per seed potato. Bigger containers and the fill-and-hill method give better yields.
Choosing a Container
Bigger is better. The more mix a container holds, the more room the roots have and the larger your harvest. Use a minimum of about 40 litres, which suits 3 to 4 seed potatoes. Half-barrels, large tubs, and 50 to 60 litre grow bags all crop well.
- Fabric grow bags are ideal. They drain freely, air-prune the roots, and fold flat for storage. Many have a flap at the base so you can reach in for new potatoes.
- Drainage is essential. Potatoes rot in waterlogged mix. If your pot has no holes, drill several in the base.
- Dark-coloured containers warm the mix faster in spring, which gets cool-climate crops moving. In a hot northern summer, pale containers or a shaded position stop the mix overheating.
Seed Potatoes, Not Supermarket Spuds
Always start with certified seed potatoes from a nursery or garden supplier. They are grown specifically for planting and are certified free of the viruses and diseases that plague potatoes.
Supermarket potatoes are tempting but risky. Many are treated with a sprout inhibitor so they will not grow well, and they can carry potato virus and other diseases into your container. For the price of a bag of seed potatoes you get a healthy, reliable start.
Chitting (Pre-Sprouting)
Chitting gives seed potatoes a head start before they go in the mix. Stand them eyes-up in an egg carton on a bright windowsill out of direct sun for 2 to 4 weeks. They are ready when each tuber has several short, stubby green sprouts about 1 to 2 cm long.
Chitting is optional but worthwhile, especially for early varieties and shorter seasons. Rub off all but the three or four strongest sprouts on each tuber so the plant puts its energy into fewer, stronger stems.
Planting: The Fill-and-Hill Method
The fill-and-hill (or earthing-up) method is the secret to a heavy container crop. You plant low and keep adding mix as the shoots grow, which buries more stem and produces more tubers.
- Fill the container with about 15 cm of good-quality potting mix mixed with some compost.
- Sit the chitted seed potatoes on top, sprouts facing up, spaced evenly. Allow about 10 litres of mix per tuber.
- Cover with around 10 cm of mix and water in.
- When the shoots reach 15 to 20 cm tall, add more mix to bury the lower two-thirds of the stems, leaving the top leaves poking out.
- Repeat this hilling every couple of weeks until the mix nearly reaches the rim. Never bury the foliage completely.
Position and Soil
Potatoes want full sun, at least 6 hours a day, for a good crop. A sunny patio, balcony, or courtyard is perfect, and the container can be turned or moved to chase the light.
Use a quality potting mix rather than garden soil, which compacts in pots and can bring in disease. Lighten heavy mixes with a little extra compost for fertility and structure. Potatoes prefer slightly acidic conditions, around pH 5.5 to 6.5, which also helps keep scab at bay.
Watering and Feeding
Containers dry out far faster than garden beds, so check the mix daily in warm weather. Keep it evenly moist but never waterlogged. Water is most critical at flowering and tuber set, when the plant is forming its crop. Erratic watering at this stage causes knobbly tubers and hollow centres.
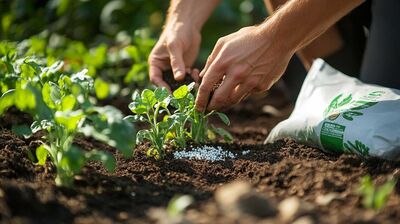
Feed with a fertiliser that is higher in potassium, the nutrient that drives tuber development. Avoid feeds heavy in nitrogen, which push lush leaves at the expense of potatoes. A liquid feed every two to three weeks through the growing season keeps plants productive in the limited volume of a container.
Early vs Maincrop
Potatoes are grouped by how long they take to mature, and the type changes how you use a container.
- Early varieties mature in about 70 to 90 days and are perfect for containers. You get a quick crop of tender new potatoes and free up the pot sooner.
- Maincrop varieties take longer, often 120 days or more, but produce bigger tubers and a larger overall yield that stores well. Give them your largest container.
Best Varieties for Australian Containers
These certified seed potatoes are widely available in Australia and suit container growing.
| Variety | Type | Best for |
|---|---|---|
| Dutch Cream | Maincrop | Waxy, buttery flesh. Versatile all-rounder, excellent mashed or roasted. |
| Kipfler | Maincrop (fingerling) | Long, knobbly waxy tubers with a nutty flavour. Superb in salads. |
| Nicola | Early to mid-season | Waxy, yellow-fleshed and reliable. A good quick container crop. |
| Sebago | Maincrop | The common Australian all-rounder. Smooth white spud, good for chips and bakes. |
| Desiree | Maincrop | Red-skinned with creamy flesh. Tough and high-yielding, good roasted or boiled. |
| King Edward | Maincrop | Classic floury baker and roaster. Big tubers from a large container. |
When to Plant by Australian Climate
- Tropical and subtropical (Darwin, Brisbane, Gold Coast): Plant through autumn and winter, when conditions are cooler and frost is not a concern. Avoid the wet, humid build-up, which encourages blight.
- Warm and cool temperate (Sydney, Perth, Melbourne, Adelaide): Plant in spring once the last frost has passed. A second autumn crop is possible in milder pockets.
- Cool and cold (Hobart, Canberra): Plant in spring after the frosts. Because containers are mobile, you can start a little earlier and move them under cover if a late frost threatens.
Frost kills potato foliage, so the timing rule across Australia is simple: grow the foliage in the frost-free window for your region. Mobile containers give you more room to move than an in-ground bed.
Harvesting and Storage
For new potatoes, harvest early varieties when the plants begin to flower. Reach into the mix, or open the flap on a grow bag, and take a few tender tubers while leaving the plant to keep growing.
For a full crop, wait until the tops yellow and die back, which signals the tubers have finished bulking up. Stop watering, then tip the whole container onto a tarp and sort the potatoes out by hand.
Let maincrop potatoes dry and firm their skins for a few days in a shady, airy spot before storing. Keep them somewhere cool, dark, and dry, never in the fridge or a sealed plastic bag. Store any damaged tubers separately and eat them first.
Common Problems
Blight
Brown blotches on leaves and stems that spread fast in warm, humid weather, eventually rotting the tubers. Improve airflow, water at the base rather than over the leaves, and remove affected foliage promptly. In humid regions, choose the cooler, drier part of the year to grow.
Green tubers
Greening is caused by light reaching the tubers. The green colour signals solanine, which is bitter and mildly toxic, so do not eat green parts. Cut them away generously or discard badly greened spuds. Prevent it by keeping tubers covered with mix while growing and stored in the dark.
Scab
Rough, corky patches on the skin. It is harmless to eat once peeled but unsightly. Scab is worse in dry, alkaline conditions, so keep the mix evenly moist and slightly acidic, and avoid adding lime before a potato crop.
Hollow heart
A cavity in the centre of large tubers, caused by uneven growth from irregular watering. Keep moisture consistent, especially during flowering and tuber set, and avoid over-feeding with nitrogen, which can trigger growth spurts.
Track Your Container Spuds
The Planting Season app tells you when to plant potatoes in your region and sends reminders for hilling, feeding, and harvest time.
Open the App →Frequently Asked Questions
What size container do I need to grow potatoes?
Use a container of at least 40 litres. A 40 litre tub or grow bag comfortably holds 3 to 4 seed potatoes. Bigger is better, as more mix means more room for tubers and a larger harvest. Fabric grow bags, large pots, and even sturdy buckets with drainage holes all work.
How many seed potatoes should I plant per container?
Allow about 10 litres of mix per seed potato. A 40 litre container suits 3 to 4 tubers. Crowding reduces the size and number of potatoes, so do not overfill. Use the calculator on this page to match seed potatoes to your container.
Can I plant supermarket potatoes?
It is not recommended. Supermarket potatoes are often treated with a sprout inhibitor and can carry diseases such as potato virus. Buy certified seed potatoes from a nursery or garden supplier. They are disease-free and bred to crop reliably.
What is chitting and do I need to do it?
Chitting means pre-sprouting seed potatoes in light before planting. Stand them in an egg carton on a bright windowsill, eyes facing up, for 2 to 4 weeks until short green sprouts form. It is optional but gives plants a head start, which is helpful for early varieties and short seasons.
What is the fill-and-hill method?
Start with about 15 cm of mix in the container, sit the seed potatoes on top, and cover with a little more mix. As the shoots grow, keep adding mix to bury the lower stems, leaving the top leaves exposed. This buried stem produces more tubers and keeps them away from light.
When can I plant potatoes in Australia?
In frost-free subtropical and tropical regions, plant through autumn and winter. In temperate and cool regions, plant in spring once the last frost has passed, because frost kills potato foliage. Containers can be moved under cover, which lets cool-climate gardeners start a little earlier.
Why are my potatoes green and are they safe to eat?
Green patches form when tubers are exposed to light. The green colour signals solanine, which is mildly toxic and bitter. Do not eat green parts. Cut them away generously, or discard badly greened tubers. Prevent greening by keeping tubers covered with mix and storing the harvest in the dark.
How do I know when container potatoes are ready to harvest?
For new potatoes, harvest early varieties when the plants start flowering. For full-size maincrop potatoes, wait until the tops yellow and die back, then tip the whole container out and sort the tubers. Let maincrop skins firm up for a few days before storing.
See also: Potato in the Plant Library